

Everyone and their aunt wants to learn how to record music at home. But this guide is only for those who actually want to get started producing pro-level music on a regular basis.
If you want to learn how to record music at home, you’ve come to the right place. Here’s what this post will cover:
-
- The Essential Home Recording Studio Equipment
- Treating Your Recording Space
- How To Record Music at Home: First Steps
The Essential Home Recording Studio Equipment
Technically, you can produce a song completely on your phone. Steve Lacy of The Internet produced the song “PRIDE” off of Kendrick Lamar’s album DAMN…on an iPhone.
But because recording equipment is now so affordable, you can invest a little money in quality gear and software. Plus, who wants to produce a bunch of music on an iPhone? That’s cool for maybe one song, but the usability is not ideal long-term.
So if you want to learn how to record music at home, here are the essential pieces of gear and software you’ll need…
Desk and Office Chair
You might think it’s silly to talk about needing a desk and chair, but you have to make sure you’re comfortable while recording.
You’ll potentially be sitting in this chair at this desk for hours. So the chair has to have good back support and the desk needs to set your computer at eye height.
This is the central part of your home recording studio setup, meaning it’s the first thing to take care of.
Laptop or Desktop Computer
Again, it’s not ideal to produce music on a smartphone. So you’ll need a laptop or desktop computer.
It needs to have enough memory, RAM, and processing power to efficiently run recording studio software. Pretty much every Apple computer has what you need to start recording at home (GarageBand even comes built-in).
For a Windows computer, here are the recommended specs:
- Multi-core processor (preferably Dual-Core Pentium, Intel Core series, or AMD Athlon 64)
- 1 GB RAM for Windows XP and 2 GB RAM for Vista
- 40 GB system drive hard disk space and 80 GB separate physical audio drive
- Drive speeds of 7200 RPM
Digital Audio Workstation
A digital audio workstation (DAW) is your recording software. There’s a lot of debate about what DAW is the best, but you can ignore those conversations. The key is to pick your favorite DAW from the best options (i.e. the software the pros use) and learn it inside and out.
They all basically do the same stuff, so the most important thing is to know how to use your chosen DAW.
I personally love Reaper and have gotten to know it pretty well. But you have to find the one you like best.
Here are tutorials for each of the top DAWs on the market:
Microphone / XLR Cable / Mic Stand
Unless you’re purely a beat-making producer, you’ll need a microphone, whether it’s for vocals, acoustic guitar, or any other live instrument (not MIDI).
Along with that, you’ll need an XLR cable (the mic cord) and a mic stand.
One of the most versatile mics that’s in pretty much every professional recording studio is the Shure SM58. It’s a dynamic mic, meaning it can handle loud sound sources and does well in untreated spaces. Plus, it’s only about $100.
If you want a more sensitive mic that picks up more detail, I use and recommend the Audio-Technica AT2035. It works well on both vocals and acoustic guitar.
If you have a bigger budget and want a vocal mic the pros use, check out the Shure SM7B. It’s a dynamic mic that has the clarity of a condenser mic.
Audio Interface
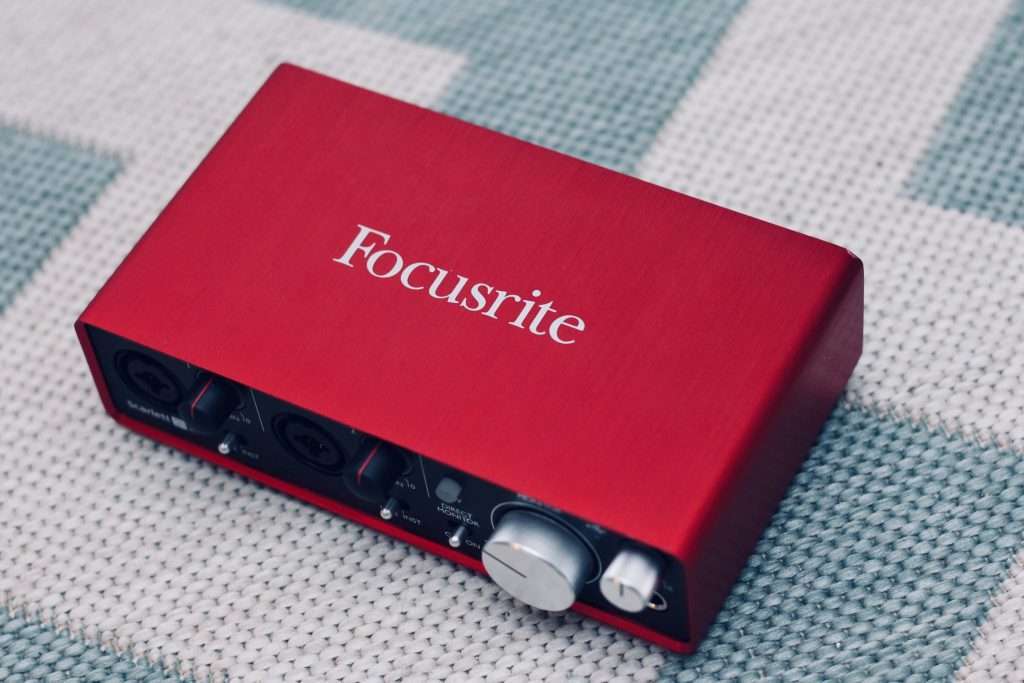
An audio interface is the device you plug your mic or guitar cable into, and this device plugs into your computer, usually via USB. It allows you to record music at home on a professional level.
I started out with the Focusrite Scarlett 2i2, which is both affordable yet captures and transmits high-quality audio.
Another good option for beginners is the Focusrite Scarlett Solo Studio Bundle, which includes: the Scarlett Solo USB audio interface, a condenser mic, an XLR cable, and a bunch of other valuable gear and software.
Monitors and Headphones
If you’ll be recording any live instruments or vocals, you need headphones. Without them, the sound from the monitors will bleed into the recording.
If you can only afford either headphones or monitors, go with headphones. Now, there are two types of headphones: open-back and closed-back.
Closed-back headphones are best for recording because they totally encapsulate your ears, offering sound isolation and reducing bleed into the mic. I use and highly recommend the Sennheiser HD280PRO headphones.
Open-back headphones are better for mixing because they allow some of the sound to escape, creating an experience slightly closer to using monitors, which are the ideal medium for mixing.
Treating Your Recording Space
You can record music pretty much anywhere. I’ve recorded in garages, bedrooms, and walk-in closets.
Below, we’ll cover the ideal treatment options. But generally, it’s best to deaden the sound as much as possible, unless your home/apartment somehow has amazing acoustics.
Why deaden the sound?
Because you can always add imitation room noise when mixing, but you can’t remove actual room noise because it’s in the original recording. Using reverb and delay, you can emulate whatever room sound you want.
So, to help lessen the amount of natural reverb and delay in your recording space, you can treat your room to absorb and diffuse frequencies. Absorption and diffusion help reduce reflected sound (the frequencies bouncing off the walls) and leave you with more direct sound (instrument-to-mic frequencies).
Below are some ways you can treat your recording space with absorption and diffusion. But if you’re on a tight budget, you can emulate these methods with blankets, pillows, even a twin mattress.
Acoustic panels
Acoustic panels absorb some of the mid-to-high frequencies of your recording space, which basically means there are fewer frequencies bouncing around the room. And this can lead to a cleaner recording.
Place these panels directly behind your studio monitors, on the wall directly opposite your monitors, and on the left and right walls at ear level.
Diffusers
Diffusers break up the sound in your recording space, thus reducing the number of reflected frequencies
Typically, diffusers work best in bigger rooms and are not always needed in smaller spaces. If you record music at home, you probably have makeshift diffusers already, like a bookshelf or a dresser.
Vocal reflection filter
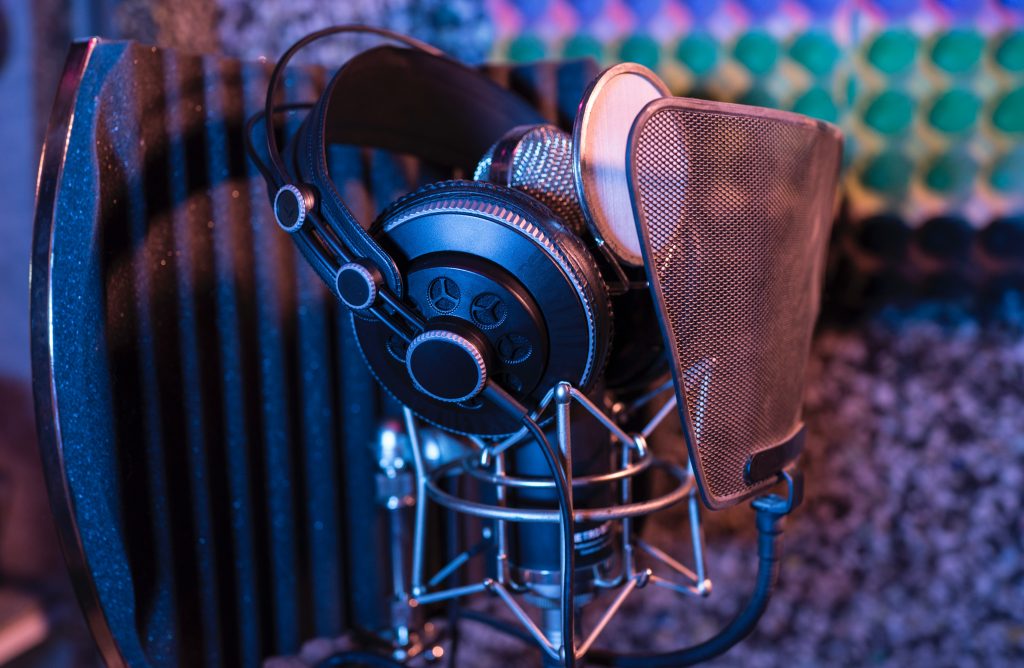
A vocal reflection filter is a semi-circular device that sits directly behind your vocal mic and absorbs a lot of the frequencies.
This drastically cuts down on reflected frequencies that would have bounced around the room before returning to the mic (which you don’t want).
Bass traps
Bass traps are the most expensive treatment method on this list, but they are very important.
They sit in the top corners of your recording room because that’s where low frequencies tend to build up, causing ugly sounds in your recording.
Bass traps mainly absorb (or “trap”) low frequencies, but they can also absorb some mid-to-high frequencies.
How To Record Music at Home: First Steps
-
- Whether it’s your first time or 100th time recording music at home, here are some tips to get you started…
- Set your time signature and BPM
- Create a simple beat to supplement your click track (this makes it easier to stay on time – you can remove it later)
- Record your main instrument
- Record scratch vocals so you can easily keep track of where you are in the song
- Layer in the other instruments and elements as you hear them
- Use someone else’s song as inspiration for your production (i.e. use a reference track)
And that’s how to record music at home. If you’re new to this stuff, these steps will get you started.